We had a few warm days last week. It was exactly what I needed to get the creative juices flowing again. Remember these little birds from the Dollar Store?! I had one left with a chipped wing. I gave it a few coats of fresh white paint and now it's perfect for my spring decor!
I love upcycling old food cans. Again, some simple white paint and it looks so pretty holding some of my French script candles. I'll just have to be extra careful when lighting them! Label is from the Graphics Fairy and designed by Diana from The Dreams Factory.
Easter candy displayed in old marmalade jars is my favorite!
My favorite "nook" in the house. It's right behind our front door. When you come in, you are greeted by the sweet aroma of the lavender (bundle from Home Goods, tote from Kohl's and hat from Charming Charlie).
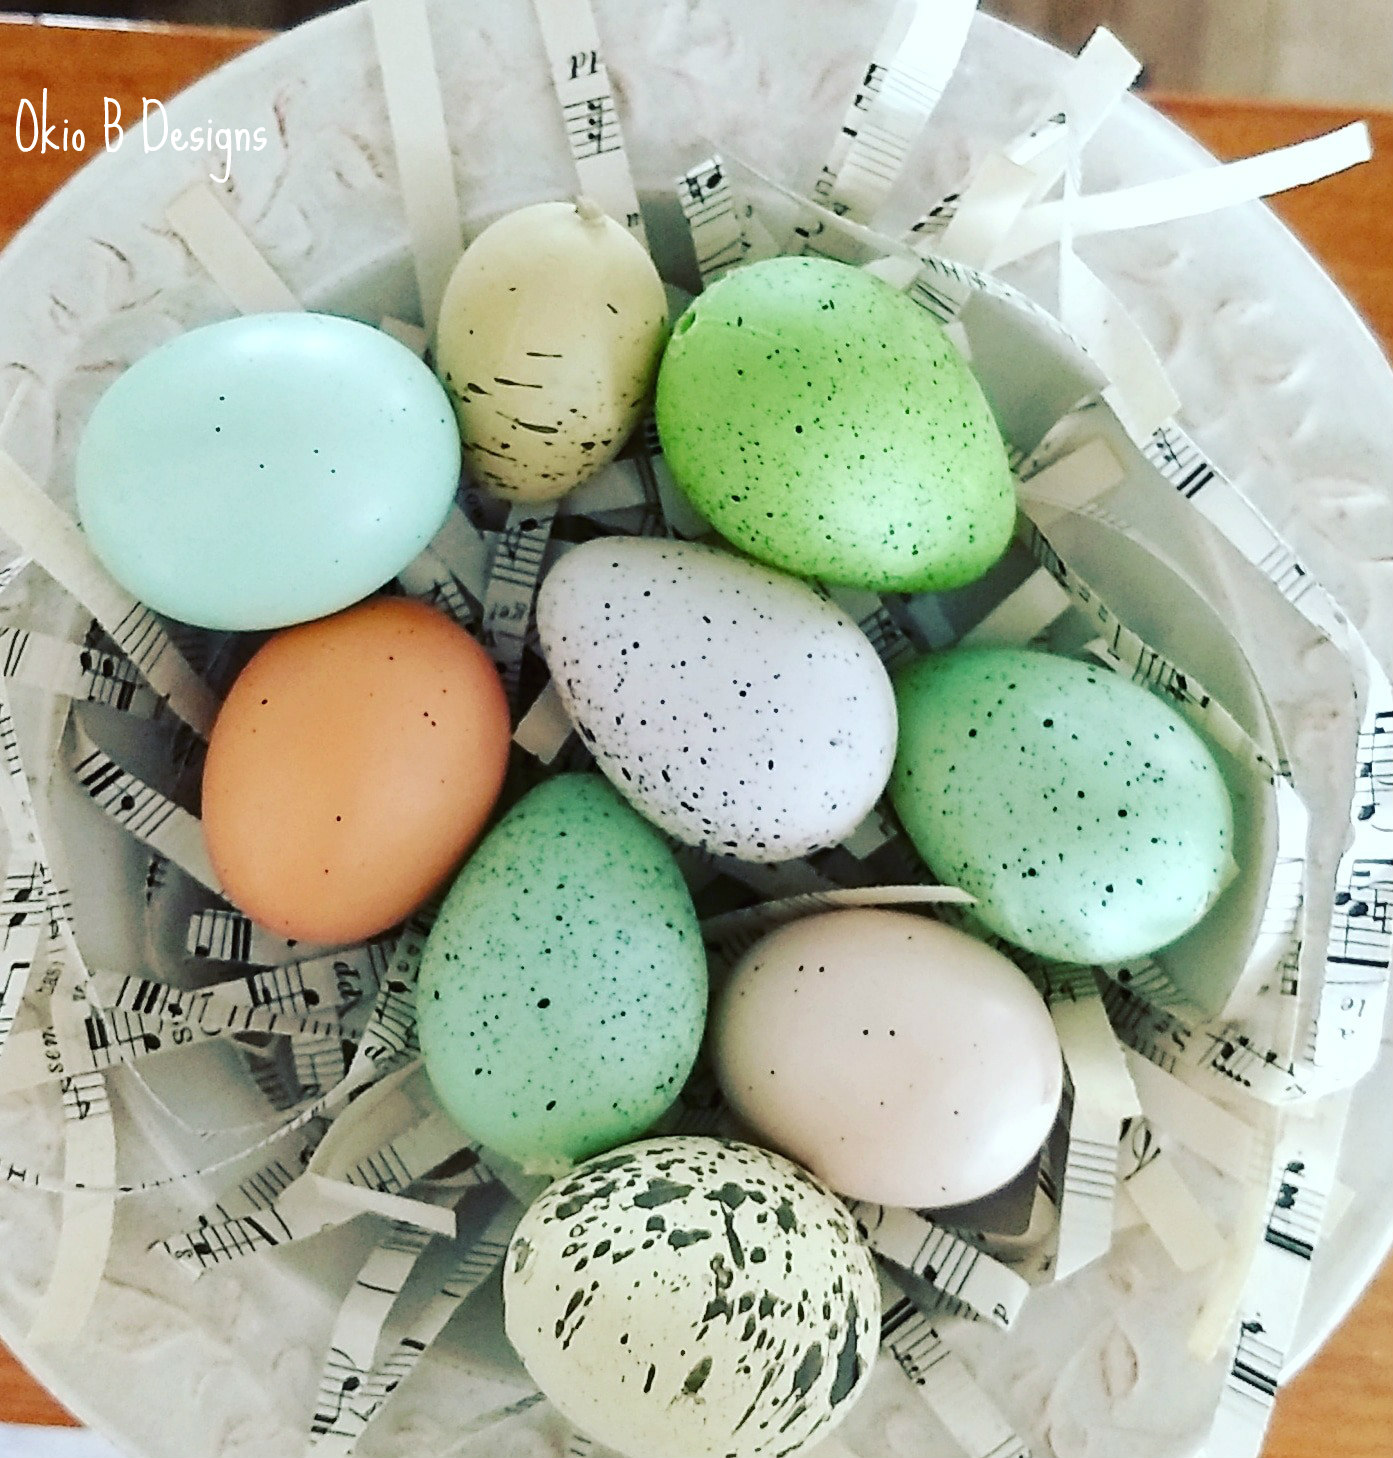
Easter eggs in a vintage enamel pot to add a touch of spring to our front porch. (Faux eggs from Michael's and Hobby Lobby.) Although we're back to cold and rainy weather, these simple spring touches have definitely brightened my mood. Jeanine
How excited was I when I found this petite apothecary jar at our local thrift store?! And for only $1. Let's just say I couldn't get it home fast enough to do this to it...
I washed and dried it, and then added some faux robin's eggs and a bit of ribbon. Literally took me all of ten minutes to create a new piece of spring/Easter decor. Did I mention it was only $1! Jeanine
I don't know about you, but I'm not a huge fan of this time of year. Spring officially starts tomorrow - woo hoo. And yet the weather here says otherwise. I'm still cold and in a bit of a funk as a result. I started decorating for spring/Easter to help brighten my mood.
I haven't been able to paint much - because it's too cold. So I've been trying to stay crafty doing small paper projects here and there.
And working with what I already have in the house.
I can't wait for that first warm, 60 degree day here. I know it's coming, but I'm so impatient. Sigh! Jeanine
My boys are off from school this week, so I'm sharing some projects you may have already seen if you follow me on Instagram (@okiobdesigns). First up is this vintage book stack. I scored the books at our local thrift store and hand-stamped home sweet home on them. Simple but oh-so-sweet!
And speaking of books, this book worm desk sitter was supposed to be headed to my Etsy. However, I liked it so much, I just may keep it for myself! I used vintage Scrabble tiles in varying sizes and fonts.
This is another faux chalkboard sign. I used the same chalkboard background as I did for my eat sign that's nestled on my kitchen counter. For this one I chose another font from DaFont and typed Established 2001 on my chalkboard background. It took a while for my husband to realize the significance, sigh! Not only were we married in 2001, we also bought our house in 2001. Men!
Last up are these itty bitty, cheeky pillows. I'd like to say they were no-sew, but I did break out the sewing machine - in addition to iron-transfer paper - for these bad boys. I found the images on Pinterest and simply printed them on my transfer paper (don't forget to mirror your image!). A quick iron, sew and stuff, and I have them tucked into a vintage-inspired crate in our livingroom. Once the boys go back to school, I'll be in full crafting mode again! Jeanine
Sharing an oldie, but goodie project today. It's perfect for any unused bathroom tiles you have laying around. This idea has been floating around the blogosphere and Pinterest for quite a few years now. If you haven't tried it yet, here's a quick tutorial.
All you need are some bathroom tiles, Mod Podge, a paint brush or foam brush, and some cute napkins. I got mine from Marshall's. Cut your napkins a little larger than your tiles. Napkins are usually 2- or 3-ply, so you'll want to peel back those layers until you have 1-ply.
Spread a layer of Mod Podge on your tile and then add your napkin on top - evening out any air bubbles that may form. Once that dries, you can trim off any excess. Next, add a layer of Mod Podge over your napkin. You can add as many layers as you want to seal the image, but I only added one. Once that dries, add either a felt or cork backing to the bottoms to prevent the tiles from scratching surfaces. This project literally took an hour in total (most of it was drying time!) and now I've got some pretty new coasters! Jeanine
Sometimes it's nice to get back to basics. And that's exactly what I did with these French market candle holders. No fancy transfer methods. Just good ol' fashioned Mod Podge and some timeless images from The Graphics Fairy.
All I did was print out my images on regular white paper, cut to size and added a few coats of Mod Podge, and some embellishments. Easy peasy!
Same for this sweet lavender jar I made from a Trader Joe's Everything But the Bagel jar. I used Goo Gone to remove the original label, washed out the jar and added my lavender buds. The image is also from The Graphics Fairy. I printed this one out on sticker paper and then just cut, peel and stick! Although this wasn't rocket science, I'm still very pleased with my most recent upcyles! Jeanine
There is a fun, little secret behind this upcycled mini chalkboard. It is yet another thrift store find of mine. The backside is riddled with crayon marks, but that didn't stop me from seeing its potential.
I way lying in bed thinking about it - seriously! I was wondering how I could print out the word eat and add it to this little pretty. Clear sticker paper wasn't going to give me the look I wanted. Neither was Mod Podge.
Then it came to me! I clicked on over to Pinterest and found a chalkboard template. Using Windows Paint, I typed out the letters and hoped for the best after I hit print. And it worked!
Yes, you are looking at a faux chalkboard image! Amazingly it looks like the real thing and fit perfectly to size. All I did was glue it on and distress the edges of the wood frame. After patting myself on the back a few times for achieving the look I wanted, I quickly popped it into the wood tote on my kitchen counter. I'm love, love, loving how it came out.
I'm sharing the pdf of it, in case you want to make your own! Just right click on the image and save to your computer. Jeanine
Valentine's Day is just three weeks away, and love is definitely in full bloom at our house. Over the weekend, I worked on three different love ribbons that are currently for sale in my Etsy.
The first one is just simply...love. I hand-stamped the word (several times!) on some off-white seam binding ribbon. So simple, yet I adore how it came out. So much so that I kept some of the ribbon for myself as you can see from the first picture.
Next, I used some carnival style letters on watermelon-colored muslin. This one sold within 2 minutes of me listing in my Etsy. Sadly, it was my last piece of colored muslin, so no extras for me.
Last up is this je t'aime ribbon. I used the same off-white seam binding as my first love one. Again, it's stamped several times over the yard or so of ribbon. Understated and elegant in French! How are you decorating for Valentine's Day?! Jeanine
I've had this pretty, white Ikea pitcher for a few years now. I had originally given it a Frenchy makeover using waterslide decal paper. Since, I'm trying to "shop the house" this month, I decided to give it a facelift. Because...
...the elements were not kind and this is what it looked like yesterday. Yuck! Thankfully, Goo Gone was able to remove the waterslide decal stickiness, and I was able to replace that label with the fresh sticker in the first picture. I used clear sticker paper this time. I don't love the air bubbles, though, so I will likely return to using the waterslide decal paper.
Speaking of shopping the house, I grabbed this food jar I upcyled many moons ago and gave it a new look by adding the broken wood ruler pictures. It's now the perfect touch of rustic/farmhouse goodness!
Okay, so I did splurge on something new this week. I picked up this Laguna vase at Home Goods yesterday - although it didn't cost me a dime! I had a $10 gift certificate (you get them if you have the TJX credit card), so I popped in and grabbed this beauty. I've wanted one since forever. I simply added some faux flowers from the Dollar Store and I love, love, love it! I love that it was free even more. Jeanine
A few months ago while driving my boys to school, I spied a bedspring on the side of the road. Let's just say I could not stop my car fast enough and load it in.
It was your standard brown bedspring, and it's been sitting in our garage awaiting the end of the holiday season. Once January 1st came around, I got busy.
I started by giving it a few coats of white paint - on both sides. Once it was dry, I lugged it inside and started adding some embellishments like the number tag on top. Since Valentine's Day is around the corner, I decided to start by giving it some love.
The LOVE banner I made a few years ago. It fits perfectly! Then I just started adding some old black & white photos of mine and my husband's parents, book pages (French poetry and Romeo & Juliet), wood clothespins and other pieces.
My parents on their wedding day.
My father-in-law.
French poetry book paper. I'm super excited by how it turned out. I can't wait to decorate it for each season and holiday. I haven't decided whether or not to hang it up, so for now it's in our guest room. Total cost for this project: $4.99 for white spray paint. I had everything else I needed. Jeanine
Christmas is a big ol' blur for me. Between all of the Elf on the Shelf craziness, shopping, wrapping presents and hosting Christmas day, I'm finally able to breathe. I've already taken down a bunch of our Christmas decorations. In their place, I'm going with a winter theme. The winter vignette above is in our livingroom.
In the dining room and on our antique desk, I have another winter setting. I found the winter printable on Pinterest (it's free!) and I swapped out the Christmas message on my Jello mold pin cushion with Let it Snow. As you can see from both pics, I'm not parting with my little red trucks just yet.
I also made a sweet snowflake banner using vintage images found on The Graphics Fairy. I used vintage dictionary paper and some twine. Easy peasy!
And I may or may not have already started making some Valentine's Day pieces. All I needed for this was some Scrabble tiles, the holder and hot glue - and of course a love of all things French! I'm making some changes for the blog and my Etsy shop for 2019, so stay tuned! Jeanine
I love, love, love scented candles! I couldn't light them for years when my boys were small because I was always afraid they would get burnt or knock them over. Now that they are older, I'm thrilled to be able to indulge in my passion once again.
With that said, I must admit I'm a picky candle connoisseur. If a scented candle doesn't actually give off a scent, I will skip it. So imagine how thrilled I was when Goose Creek Candle Company sent me their White Icing Cinnamon Roll large candle (on sale now for $10.99!).
Let me just say: it smells delish! When my boys came home from school the other day, they asked if I had made cinnamon rolls. Seriously that's how good this candle smells.
If you're not familiar with Goose Creek Candle Company they are based in Kentucky and offer an amazing selection of affordable, scented candles. Each is proudly made in the USA and feature a patented duo-wick that ensures your candle burns evenly and clean. They also use lead-free, 100 percent cotton wicks.
Other flavors I'm dying to try: Balsam Fir, Dazzling Popcorn and Teakwood Merlot, to name a few. If you've been on Santa's nice list this year, maybe you'll find a Goose Creek Candle under your Christmas tree. If not, just visit their site! Jeanine
Disclaimer: I received a free product sample in exchange for a review, however, all opinions, text and photos are my own.
I am a small business owner by day, and mom of two boys and DIY crafter by night. You might remember me from my old blog: One Cheap B*tch. I love sharing my tips and tricks to create affordable home decor, fashion, food, crafts and more! Drop me a line at spam-proof: jeanineb4etsy(at)yahoo(dotcom). Thanks for stopping by!
Jeanine
OkioBDesigns is a PR-friendly blog. If you have a product or service, you'd like to submit for review, please email me at jeanineb4etsy(at)yahoo(dotcom).
Please use the email address above for advertising rates and information.