Powered by Blogger.

Okio B Designs

A craft, food, fashion, home & shopping blog

I love dressing up this vintage school desk we have in our diningroom.  Of course, 'tis the season for some Christmas touches.
I did a Pottery Barn knock-off with the noel letters.  I've been wanting to do it for literally two years.  I finally remembered to pick up the letters during my last trip to A.C. Moore.
The snowman and reindeer are from Home Goods.  I made the framed holiday sheet music using a graphic from The Graphics Fairy and Dafont for the lettering: Have a Holly Jolly Christmas.
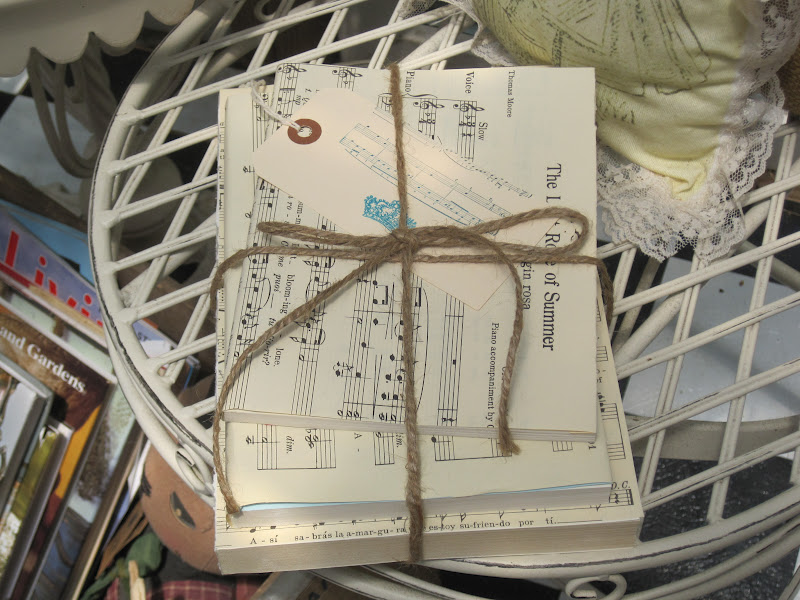
I also added some handmade Joyeux Noel clothes pins and ornaments I picked up from Kohl's last year.  The bird candleholder is from the Dollar store and the little embellished book is tucked there year-round.

I'm definitely getting into the holiday spirit!

Jeanine
Share
Tweet
Pin
Share
2 comments
I whipped up this quick holiday banner the other night.  It's super simple.  All you need is some sheet music, paper, glue, twine and clothes pins. 
Using the same NOEL template I used on my Ikea stars (carnival style from Dafont.com), I printed out each letter onto white paper.  I cut each letter a bit smaller than my sheet music.  Glue them onto each piece of your sheet music.
Once they are dry, you might want to flatten under a book.  Mine curled a little.  I used a zigzag scissor to cut the bottoms just to give a bit of a pattern but you can leave them straight or cut however you might like them.  I used some of my Christmas clothes pins to attach them to the twine.  I was not in the mood for hot glue and the pins hold them just fine.

Two thumb tacks are ready and waiting to hang it up over the next couple of weeks.  See, told you - see easy!

Jeanine
Share
Tweet
Pin
Share
5 comments
I don't know about you but when I craft, I just can't seem to throw out bits and pieces of paper, cardstock, etc.  While those random bits come in handy occasionally, they are taking over precious space in my little craft room/office.
In between the movies and pumpkin picking this weekend, I broke out this petite dollar store clipboard for a quick organizational makeover.  First I spray painted it white.  Once that was dry, I Mod Podged some vintage sheet music to the front.
The bits of lace on the top are some of those random bits and pieces I was talking about.  Luckily they fit quite nicely on top.  I used the cover from an old sheet music book to make a pocket for the bottom of the board.  I printed out the French receipt from The Graphics Fairy to add my miscellany wording.
Now I can nicely tuck in some tags that I use as thank yous for my Etsy shop, and other small random pieces that I just can't seem to part with.

Jeanine
Share
Tweet
Pin
Share
6 comments
I get to enjoy summer Fridays from Memorial Day to Labor Day.  And even though today was a rainy mess, I ventured out to an estate sale not too far from my parent's house.  As luck would have it, it was held by a woman who is a mixed media artist and shabby chic collector.  I could hardly contain myself!
The two painted wood frames were $1 each.  I plan on painting the memory box/letter box white and hanging it in my craft room.  It was $5.  The wire basket was the most expensive at $15 but well worth it.
I'm a sucker for little baskets!
And I could not resist the boxes of pastel easter eggs for $1 each.
It's hard to tell what the above photo is but it's actually, two little vintage wire baskets and one tall one that holds a test tube sized vase.  Cute, cute, cute!  I'll be adding those to my Etsy shop after I jazz them up a little.  Not pictured is another great stack of sheet music.

There is another local estate sale here tomorrow and I can't wait!  Hoping it will be as fruitful as today's!

Jeanine
Share
Tweet
Pin
Share
2 comments
Yesterday was the hottest day of the year here so far.  Of course, we lost power.  Argh!  So between 6 p.m. and midnight, we sweated our little butts off.  Somewhere in between dunking my head in a tub of cold water and polishing off another can of Diet Coke, I made this sheet music book stack:
I used some vintage sheet music from my garage sale stash to cover these dollar store books.  Remember when you used to have cover your books in grammar school?  I used the old tape and fold method.  Mainly because I could only find my tape in the darkness - doh!
I have them in the tea room on the old bench that I redid a few weeks ago.  Not sure if you can make out the tag with the crown and few lines of hand-stamped sheet music?!
Just some random views from the tea room.  All set up for a tea party!  You can see some garage sale finds that I redid like the crate with wheels holding some books and magazines, and the gold frame I redid with chalkboard paper.
Some old china in a cabinet the hubby redid.
A nice comfy spot to relax and unwind.
White birdcage.

Stack of old suitcases and Pepsi crate.  You can see my boys have been in there.  Note the Lego piece tucked into the crate!

Happy to have our power back on but it's still sweltering here.

Jeanine
Share
Tweet
Pin
Share
1 comments
Saw some lovely mason jar candle holders on Pinterest yesterday.  Since I have a ton of them, I decided to make a few myself:
I took some vintage sheet music and ripped it on both sides so it would fit around each jar.  First, I distressed the edges a bit for a nice aged look.
Next, I wrapped the sheet music around each jar and used a glue dot to hold the overlapping piece in place.
Tie a piece of twine around, knot it and done!  You have some super cute candle holders in a matter of minutes.  I'm thinking of lining these up our front walk for our next outdoor party!

Jeanine
Share
Tweet
Pin
Share
6 comments
I am definitely not a morning person.  But it pays off when you stay awake after dropping the kids off at school and head out for some garage sale shopping.  You cannot believe the loot I scored today.  I can hardly believe it myself.  So hard to contain my excitement!  Lookie:
This old sewing box is just what I need for my craft room.  I love the old ad and image on the front.  I'm not sure if it's a repro or an actual vintage find, but I love it nonetheless.
Could not pass up this old Smith Corona typewriter for $3.
Oodles and oodles of vintage sheet music, oh my!  It was marked $7 for all but I got them for $5.
Nice stack of old books - 50 cents each!
This old fan is gorgeous.  No spray paint makeover needed here.  Although it does remind me why they don't make fans like this anymore.  Small hands + fan blades = mother's worst nightmare.
This stamp wheel with stamps was only $1.  I also snatched up some star tart tins (in my Etsy shop), old wood bats and the Pilgrim box below.
Definitely in my glory today!  I went to 6 different sales and spent about $26 for everything.  Woo hoo!  And the weekend has only just begun...

Jeanine
Share
Tweet
Pin
Share
9 comments
The boys are off from school this week so I haven't had much time to blog, much less craft.  I managed to steal a little time earlier today to make these cute, mini sheet music envelopes:
I found a great template here.  I just printed off the size I wanted (4x6) onto cardstock.  Then I traced the pattern onto my sheet music and cut each one out.  Glue along where a store-bought envelope would be sealed.
I couldn't resist adding some French stamps.
And some bees.  I even added a little pink button and a small French thank you card inside.

Super easy and I can already feel like these are going to be addictive!

Linking to: The Shabby Creek Cottage: Transformation Thursday.

Jeanine
Share
Tweet
Pin
Share
10 comments
After a bit of a blogging respite, I'm feeling much better now.  I swear the germs in our house are going round robin.  In between blowing my nose and coughing up a lung, I remembered a champagne bucket and stand I got over the summer at a garage sale.  I wanted to paint it white but my husband talked me out of it.  Still, I had to do something to jazz her up:
I decided to give her a lace makeover.  Given my level of energy for the past few days, it's probably about all I could do!  I simply hot glued some of this vintage lace under the lip of the bucket.
Then I rolled some vintage sheet music, tied them with twine and added them to the bucket.  I felt like it was still missing something so I stamped a coffee-baked tag with a French crown and script, and tied that with twine around the bucket.
I think she looks much better now.  Just have to add a few more sheet music rolls and then she'll be exactly how I envisioned!  Oh and don't tell the hubby but I'm glad I didn't paint her white!

Jeanine
Share
Tweet
Pin
Share
3 comments
Who knew a paper shredder could come in handy for craft projects?!  I just love the look of shredded sheet music and I have used it in a number of projects.  I decided to use it for these sweet Valentine's Day bags too.
First I printed off the images from The Graphics Fairy.  I used my Cricut to cut them into circles.  Then I used some Sticky Dots paper to make them into stickers.  Place them towards the bottom of the bag and then start stuffing in your sheet music.
I fill them as close to the top as possible and then tie them up with some twine. 
Then I made some of these Chocolat glassine bags using some clear Avery label paper.  It's hard to see but there is pink, faux pearl embellishment on the top.  I just love the look of glassine bags!  These are for sale in my Etsy shop.

Linking to Between Naps on the Porch: Met Monday and The Graphics Fairy: Brag Monday.

Jeanine
Share
Tweet
Pin
Share
4 comments
I made a few more painted peat pots this week and I think I'm becoming a little obsessed.  For this batch, I added some number tags along with the buttons I used on my previous bird one:
The first one is filled with rolled vintage sheet music and ones I downloaded from The Graphics Fairy.
The other two I'm still deciding on what to fill them with.  For now they are filled with shredded sheet music.  I'm leaning towards adding some fresh greens and pinecones to them for a natural, festive look.

I love that these are super simple to make and I think they'll transition nicely into my regular home decor after the holidays!

Jeanine
Share
Tweet
Pin
Share
2 comments
Hope everyone had a lovely Thanksgiving yesterday.  We enjoyed a nice, quiet, peaceful day at my Mom's.  I needed the relaxation because today I officially started to decorate for Xmas.
These are just little packages to put under our tree (which hasn't gone up yet) while we countdown to the 25th.  With two little boys who still believe in Santa, I can't have the actual gifts under the tree so I decided to do some faux ones so it doesn't look bare under there.  You can probably also see the shabby bucket I did a week or so ago.  It's pleasantly filled with some red plastic ornaments from Ikea.
This is just a little envelope I made from some vintage sheet music.  Got the inspiration from Pinterest.  I sewed up the sides to keep it closed, and then added the button, baker's twine and jingle bell.  The little tag says: "To Wish You Joy at Christmas."
Next I did a large Dollar Store matchbox - also with some vintage sheet music.  I tied this one up with twine for a more rustic look.  The "Compliments of the Season" tag I made using an image from The Graphics Fairy.
Lastly is this little shipping box that I wrapped in simple brown craft paper.  The Santa image is also from The Graphics Fairy.  I used some Ikea candy cane-striped twine for this one and added some faux greenery from the Dollar Store.

I have a bunch more to make and what's so nice is you can use any type of simple box.  Maybe even one that you might have otherwise thrown out!

Linking to The Graphics Fairy: Brag Monday and Funky Junk Interiors:SNS.

Jeanine
Share
Tweet
Pin
Share
9 comments
I was at my local Marshall's last week and could not believe the gorgeous wrapping paper they have this year!  Lookie what I picked up.  It's so pretty that I actually framed it:
I really am a sucker for sheet music and I can see lots and lots of faux presents under the tree wrapped in this paper.
I have some other plans for it on some petite boxes and such. 

And of course I can't wait to wrap some real presents with it!

Jeanine
Share
Tweet
Pin
Share
12 comments
We popped into our favorite Home Goods over the weekend looking for something we could use as an island in our new kitchen.  Of course they had their Xmas goodies out already and I spied this neat picture frame with wooden letters spelling out peace.  Since I couldn't bring myself to buy any Xmas items yet, I did the next best thing:
I made my own!

Unfortunately, I didn't have the letters to spell out peace, so this morning I headed over to AC Moore (they have redeemed themselves with me after correcting the coupon fiasco many people - including me! - encountered with them) and you know what?  They were out of those letters too!  

Plan B was to spell out the word joy, which is exactly what I did here.  These letters were pre-painted black - saving me the time and effort of painting them - and were only 29 cents each.  Yuppers, 29 cents each!  The frame was $3.50 and I had a 40 percent off coupon for it.  The red border was $1.50 I think and I had the sheet music.

I simply added my sheet music and put the glass behind the sheet music so the frame would still stay thick but the letters would stick out.  I used glue dots to attach each letter.

Seriously super easy.  The Home Goods one was $9.99.  I got them beat at approximately $3.47 before tax!

Jeanine
Share
Tweet
Pin
Share
4 comments
Older Posts

About Me

My photo
Okio B Designs
I am a small business owner by day, and mom of two boys and DIY crafter by night. You might remember me from my old blog: One Cheap B*tch. I love sharing my tips and tricks to create affordable home decor, fashion, food, crafts and more! Drop me a line at spam-proof: jeanineb4etsy(at)yahoo(dotcom). Thanks for stopping by! Jeanine
View my complete profile

Shop the Post

Follow Me on LikeToKnow.It

liketoknow.it/OkioBDesigns

Follow Me on Pinterest!

Follow Me on Pinterest

Follow Me on Instagram!

Instagram

Follow Me on Twitter

Tweet

PR/Advertising

OkioBDesigns is a PR-friendly blog. If you have a product or service, you'd like to submit for review, please email me at jeanineb4etsy(at)yahoo(dotcom).


Please use the email address above for advertising rates and information.


My tool caddy in Romantic Homes

My tool caddy in Romantic Homes

Good Housekeeping August 2011

Good Housekeeping August 2011

Search This Blog

Blog Archive

  • ▼  2025 (3)
    • ▼  February (2)
      • ~happy monday~
      • ~antiqued dollar tree frames~
    • ►  January (1)
  • ►  2024 (7)
    • ►  July (1)
    • ►  June (2)
    • ►  May (2)
    • ►  April (1)
    • ►  January (1)
  • ►  2023 (21)
    • ►  December (5)
    • ►  November (2)
    • ►  September (1)
    • ►  August (1)
    • ►  July (3)
    • ►  June (1)
    • ►  May (4)
    • ►  April (3)
    • ►  January (1)
  • ►  2022 (23)
    • ►  December (3)
    • ►  November (4)
    • ►  September (2)
    • ►  August (1)
    • ►  July (2)
    • ►  June (4)
    • ►  April (1)
    • ►  February (3)
    • ►  January (3)
  • ►  2021 (49)
    • ►  December (7)
    • ►  November (3)
    • ►  October (3)
    • ►  September (4)
    • ►  August (3)
    • ►  July (4)
    • ►  June (3)
    • ►  May (4)
    • ►  April (8)
    • ►  March (4)
    • ►  February (2)
    • ►  January (4)
  • ►  2020 (37)
    • ►  December (10)
    • ►  November (11)
    • ►  October (5)
    • ►  September (2)
    • ►  August (1)
    • ►  July (2)
    • ►  April (3)
    • ►  February (2)
    • ►  January (1)
  • ►  2019 (40)
    • ►  December (1)
    • ►  November (4)
    • ►  October (5)
    • ►  September (4)
    • ►  August (1)
    • ►  July (2)
    • ►  June (5)
    • ►  May (3)
    • ►  April (5)
    • ►  March (2)
    • ►  February (3)
    • ►  January (5)
  • ►  2018 (43)
    • ►  December (4)
    • ►  November (5)
    • ►  October (7)
    • ►  September (4)
    • ►  August (1)
    • ►  July (1)
    • ►  June (6)
    • ►  May (2)
    • ►  April (3)
    • ►  March (1)
    • ►  February (4)
    • ►  January (5)
  • ►  2017 (44)
    • ►  December (5)
    • ►  November (5)
    • ►  October (3)
    • ►  September (3)
    • ►  August (2)
    • ►  July (4)
    • ►  June (4)
    • ►  May (3)
    • ►  April (3)
    • ►  March (3)
    • ►  February (5)
    • ►  January (4)
  • ►  2016 (58)
    • ►  December (5)
    • ►  November (5)
    • ►  October (7)
    • ►  September (7)
    • ►  August (4)
    • ►  July (4)
    • ►  June (2)
    • ►  May (2)
    • ►  April (6)
    • ►  March (3)
    • ►  February (6)
    • ►  January (7)
  • ►  2015 (89)
    • ►  December (4)
    • ►  November (7)
    • ►  October (6)
    • ►  September (8)
    • ►  August (7)
    • ►  July (8)
    • ►  June (8)
    • ►  May (6)
    • ►  April (7)
    • ►  March (9)
    • ►  February (9)
    • ►  January (10)
  • ►  2014 (152)
    • ►  December (10)
    • ►  November (11)
    • ►  October (13)
    • ►  September (11)
    • ►  August (8)
    • ►  July (16)
    • ►  June (17)
    • ►  May (12)
    • ►  April (13)
    • ►  March (13)
    • ►  February (14)
    • ►  January (14)
  • ►  2013 (199)
    • ►  December (15)
    • ►  November (15)
    • ►  October (15)
    • ►  September (15)
    • ►  August (15)
    • ►  July (17)
    • ►  June (19)
    • ►  May (18)
    • ►  April (18)
    • ►  March (18)
    • ►  February (19)
    • ►  January (15)
  • ►  2012 (186)
    • ►  December (19)
    • ►  November (14)
    • ►  October (18)
    • ►  September (16)
    • ►  August (10)
    • ►  July (14)
    • ►  June (17)
    • ►  May (15)
    • ►  April (14)
    • ►  March (15)
    • ►  February (17)
    • ►  January (17)
  • ►  2011 (118)
    • ►  December (17)
    • ►  November (19)
    • ►  October (12)
    • ►  September (9)
    • ►  August (8)
    • ►  July (17)
    • ►  June (25)
    • ►  May (11)

Created with by ThemeXpose