Powered by Blogger.

Okio B Designs

A craft, food, fashion, home & shopping blog

I got this lovely little basket back in October at a garage sale.  I used it for Halloween and now with a simple switch of some ribbon, I'm using it for a place to display some holiday postcards:
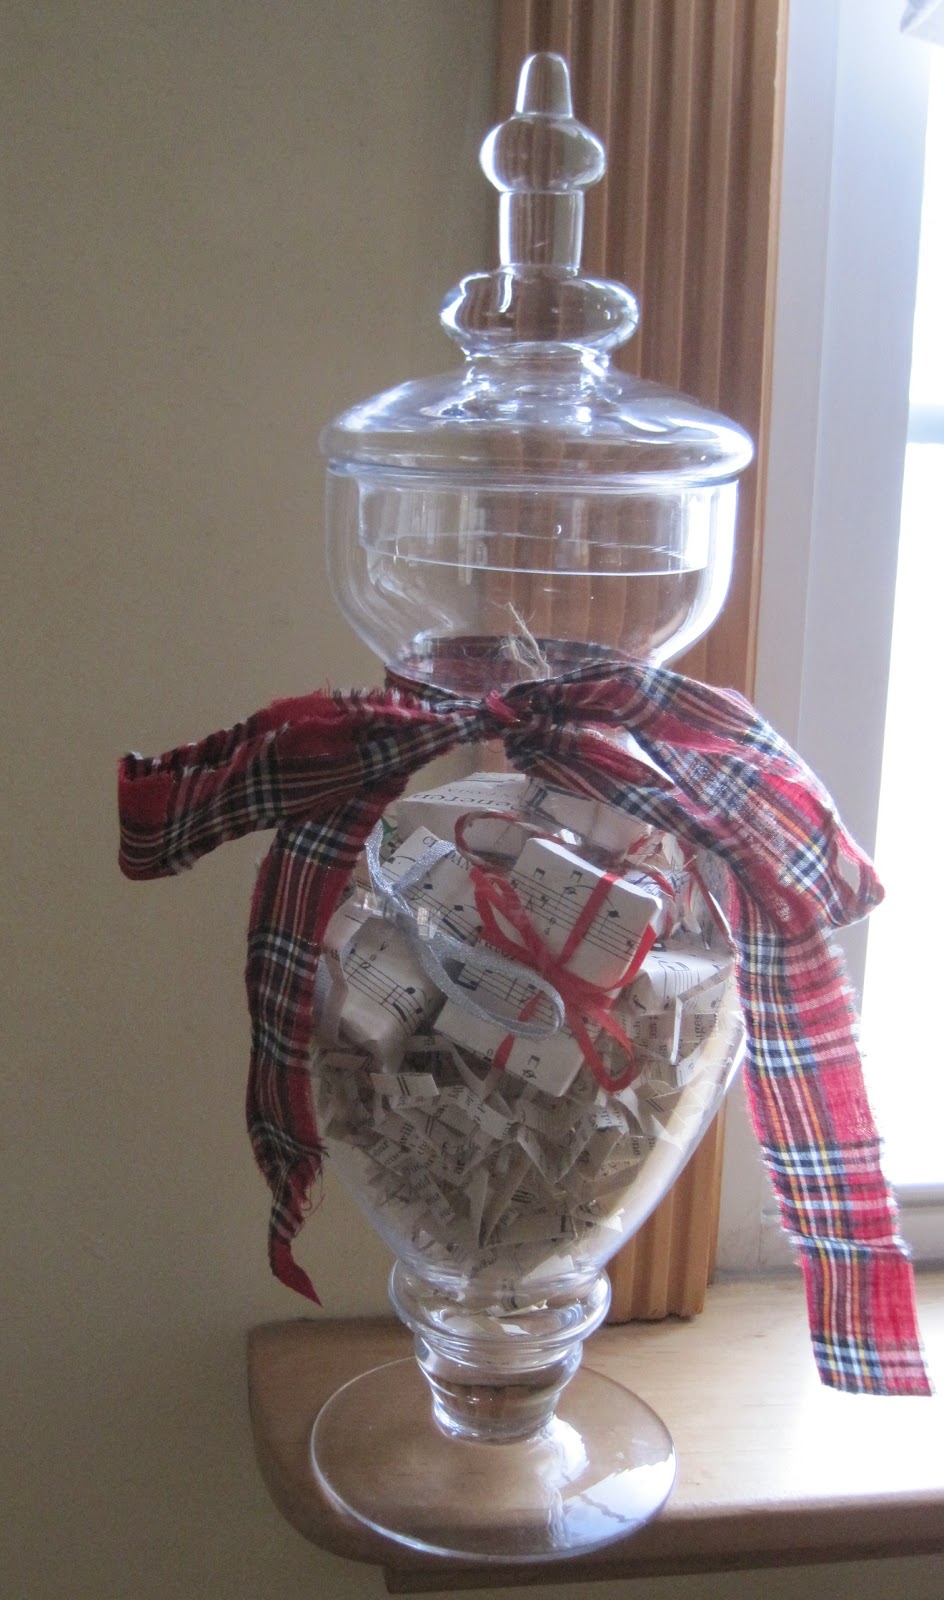
I simply added some plaid ribbon and tied it in the front.  Then I added some white tissue paper and added my postcards.  My mom gave me the vintage Santa ones last year.  The larger black and white postcards are actually from Ikea.  They show Paris, London, New York, etc. in the wintertime.  They show some really pretty scenes!
I just couldn't hide the Paris one!  I have it propped up on this vintage typewriter.

Click here for a great article with tips for selling on Etsy featuring your's truly.

Jeanine
Share
Tweet
Pin
Share
5 comments
***You still have time to enter my giveaway here!***

After searching just about every Dollar Tree in a 10 mile radius for bottle brush trees, I was just about to give up.  Luckily, I popped into Home Goods this morning and lookie what they had:
I'm so happy that I found these two pretties!  And I love the fact that I really don't have to do anything to them.  Right now they are on a shelf in my livingroom - right next to a Dollar Store birdie I picked up last year.
I also couldn't resist these little books this morning.  They were only $4.99 each.  I have them stacked on the diningroom table for now.
These are some other Xmas goodies I picked up from Home Goods last year. 
And here's a view of my Xmas kitchen window shelf which is kind of like a make-shift mantel since I don't have one:
A lot more Home Goods goodies from last year here too!
The Crown is a recent Home Goods find.  Not sure if you can tell but it's filled with some small Xmas bulbs. 

Am I the only one humming: "Oh it's beginning to look a lot like Christmas..." these days?!  =)

Jeanine
Share
Tweet
Pin
Share
7 comments
Hope everyone had a lovely Thanksgiving yesterday.  We enjoyed a nice, quiet, peaceful day at my Mom's.  I needed the relaxation because today I officially started to decorate for Xmas.
These are just little packages to put under our tree (which hasn't gone up yet) while we countdown to the 25th.  With two little boys who still believe in Santa, I can't have the actual gifts under the tree so I decided to do some faux ones so it doesn't look bare under there.  You can probably also see the shabby bucket I did a week or so ago.  It's pleasantly filled with some red plastic ornaments from Ikea.
This is just a little envelope I made from some vintage sheet music.  Got the inspiration from Pinterest.  I sewed up the sides to keep it closed, and then added the button, baker's twine and jingle bell.  The little tag says: "To Wish You Joy at Christmas."
Next I did a large Dollar Store matchbox - also with some vintage sheet music.  I tied this one up with twine for a more rustic look.  The "Compliments of the Season" tag I made using an image from The Graphics Fairy.
Lastly is this little shipping box that I wrapped in simple brown craft paper.  The Santa image is also from The Graphics Fairy.  I used some Ikea candy cane-striped twine for this one and added some faux greenery from the Dollar Store.

I have a bunch more to make and what's so nice is you can use any type of simple box.  Maybe even one that you might have otherwise thrown out!

Linking to The Graphics Fairy: Brag Monday and Funky Junk Interiors:SNS.

Jeanine
Share
Tweet
Pin
Share
9 comments
Because sometimes you just want to keep it simple:
Vintage scale, petite cloche with bird, white Xmas tree and a simple white candle which reads:
I am at Peace.
Linking to Faded Charm: White Wednesday.  There is still time to enter my giveaway here!

Jeanine
Share
Tweet
Pin
Share
10 comments
I'm pretty sure I saw this idea in Martha Stewart Living.  I had the bags.  I had the number stamps so it was really a no brainer and the kids think it's the coolest:
This is just a temporary hanging place.  I'm still not sure where to hang them from nosey little hands.  I got the striped bags off of Etsy over the summer and wouldn't you know it - there was exactly 25 of them. 
So I stamped each one and then divided them into fours so I didn't have some ginormous (is that even a word - lol?!) banner to hang up.  I don't know if you can tell but I hung them with some of my Joyeux Noel clothes pins.

The boys are very excited to fill them and then of course eat whatever goodies we add.  I think it makes for a sweet countdown to Xmas this year!

Jeanine
Share
Tweet
Pin
Share
3 comments
I don't know if these exactly qualify as bottle brush trees.  I haven't been able to find them in my local dollar store or even at my local Target.  These two minis are from Michael's and they go with one of their little Xmas villages:
I did not do much to the trees but I did paint both little wood spools white.  Then I glued each tree on top.  For my finishing touch, I stamped Joyeux Noel and Peace onto some tea-stained seam binding. 
Then I kind of just draped them around each tree - tying the seam binding in the back.  Two petite lovelies but not feeling the true bottle brush vibe so if anyone has any advice on where to find some bigger ones, I'm all ears!

Linking to Between Naps on the Porch: Met Monday.  And don't forget to enter my giveaway here.

Jeanine
Share
Tweet
Pin
Share
10 comments
***Don't forget to enter my giveaway here!***

This basket sits in my livingroom and normally holds all of my favorite magazines: Country Living, Romantic Homes, Martha Stewart Living, etc.  I wanted to make it a little more exciting so I turned it into a basket o' book stacks:
I picked up some old books this morning from the church thrift store and started tearing them apart once I got home.  Once they looked good and old, I tied them together with some twine and added them to the basket.
The book stack in the front with the flower is one I bought off of Etsy a couple of years ago.  I love the colors in the book stack to the left so I kept them as is.  The one to the right I made last year and features some crowns from The Graphics Fairy.

Yup, I think this looks much better and my magazines are safely tucked in under the stacks!

Jeanine
Share
Tweet
Pin
Share
4 comments
I promised a giveaway and here it is!  I've spent the past couple of weeks picking up craft items for me and YOU!  Here's a bird's eye view of what I'm calling Crafter's Delight:
The winner will receive a paper mache dress form, paper mache cone (or tree depending upon which way you look at it!), black tulle netting, ribbon galore, pre-strung mini wood plaque (great for using with chalkboard paint!), a fat quarter of shabby chic fabric, mini clothes pins AND...
Pink beads, silver beads, Distressed Ink, hand-dyed ribbon (from my favorite Etsy shop!), Tiffany & Company ribbon (also from a favorite Etsy shop), plain tags for your embellishments tied with baker's twine, jingle bells AND...
A black fabric pen, fabric brushes, popsicle sticks, a wood plaque, wooden spools, alphabet stamps and more!

How does that sound to you?

Here are the rules:

1. Become a follower of OkioBDesigns.Blogspot.com.  Leave a comment letting me know you are a new follower (and let me know if you are already a follower.)  Pretty simple, right?! 

You can earn additional entries by:

1. Posting about this giveaway on your blog or put it on your sidebar and let me know in a separate comment; and/or


2. Tweet about this giveaway, let me know in a separate comment with your @ name; and/or

3. Become a follower of Okio B Designs on Facebook.

This giveaway is open to residents of the U.S. only (sorry!).


Winner will be chosen via random.org at 5 p.m. EST on Wednesday, November 30, 2011. Winner will be announced shortly after that time and will have three days to confirm or an alternate winner will be chosen.

Good luck!


Jeanine
Share
Tweet
Pin
Share
35 comments
I'm not the biggest fan of working with glitter.  Mainly because I always seem to make a mess with it.  But I do love the look in the end.  This week I broke out my German glass glitter and some Martha Stewart glitter for some quick Xmas touches.  First up is this old pocketwatch:
I've seen this look on Etsy and wanted to take a crack at it so when my husband dug up this old watch, I immediately staked my claim!
I covered the top part and part of the front with Mod Podge, and then I dipped the watch into my German glitter glass.  I love the icy/snow affect the glitter glass adds to it!  It's hanging from a piece of that plaid fabric that is quickly becoming my go to for holiday projects.
These little birdies are from Ikea.  They come in a package of 4 in plain white for something like $4.99.  When I saw them, I knew I wanted to give them a quick sheet music makeover.  I also added the French stamps and gave them a generous coating of the Martha Stewart glitter.  I left the backs plain - just with the sheet music.  I think they have a Pottery Barnish feel to them with the sheet music, don't you?

Jeanine
Share
Tweet
Pin
Share
6 comments
First I wanted to send a big thank you out to Karen at The Graphics Fairy for featuring my sled on today's Brag Monday.  It really made my day!  And thank you to everyone who left such lovely comments about it!
And now onto today's project.  I had a ton of leftover Dollar Store matchboxes from two years ago.  Yup, you read that right.  I bought them two years ago to do a copycat Country Living advent calendar and a bunch of them were still hanging around:
Today I wrapped each one in vintage sheet music and tied some with twine, and red, green and silver ribbon.  Some I just left plain, while others I stamped joyeux noel on or added a simple rhinestone.
Then I added some shredded sheet music to my apothecary jar.  Just enough to bulk up the bottom of the jar.  Then I carefully added each matchbox so they settled nicely on top.  I grabbed my favorite plaid fabric - yes the same one from the church thrift store fair! - and tied that to the front of the jar.
Oh yes, it's beginning to look a lot like Xmas here.  I am waiting until after Thanksgiving to decorate but it is getting harder and harder!

Linking to: Coastal Charm: Nifty Thrifty Tuesday and My Uncommon Slice of Surburbia: Tuesdays Treasures.

Jeanine
Share
Tweet
Pin
Share
8 comments
I popped into my local Goodwill earlier this week and came back with a lot of goodies:
The bucket was only 99 cents. 
The candle holder was $6.99 - pretty pricey for Goodwill but I couldn't resist considering it came from Target where it was probably originally double the price.  I also got 5 little bottles that I plan to embellish.  First makeover is the bucket:
Can you tell I ran out of white spray paint?!  I had originally wanted to paint it white but I just ran out of it, so plan B of course was to paint it black.  Then I stenciled the 8 onto to some scrap fabric with a fabric marker.  Once that was dry, I sewed it onto a piece of burlap.  Hot glue to the front and done!  Right now it's holding some of my French script clothes pins.

Next up is the candle holder which I really didn't do too much to except that I added some of my hand-stamped joyeux noel candles.
I think it's going to look stunning on my Xmas table!
Linking to Between Naps on the Porch: Met Monday.

Jeanine
Share
Tweet
Pin
Share
10 comments
Got to play Martha Stewart yesterday.  Well, not really but I did use the fabulous stocking template mentioned in the December issue of Martha Stewart Living.  You have to go to: marthastewart.com/stocking-template to download and print it, and then you get to make one of these:
I used the larger template for this stocking.  I have been wanting to do a burlap stocking for the past two years.  I don't know why I never did one before because I do love the rustic look of burlap and lord knows I have a ton of it left over from other projects.  Seeing the stockings in MSL gave me just the nudge I needed.
I added the white wood B (for our last name) with a grungy red safety pin.  You probably can't tell but I used a little brown paint to distress it a bit and then sanded it here and there.  I'm planning on stuffing the bottom of the stocking with tissue paper and then adding little wrapped "presents" or other Xmas-appropriate goodies for a kind of "spilling" from the top look.  This will probably go on our front door this year in lieu of a wreath.

I also printed off the smaller MSL template which I plan on using with some of the fabric I got at the church thrift store fall fair last weekend.

Jeanine
Share
Tweet
Pin
Share
3 comments
I'm still happily transforming some of the goodies I got at my local church's thrift store sale a couple of weeks ago.  The sled was my first transformation, and yesterday I put the finishing touches on these cute shaker boxes:
I spray painted both of them black.  Once they were dry, I added some vintage sheet music to each top.
Then I tied them together with some of the plaid fabric I also got at the fair.  Like the sled, I used the faux Dollar Store berries and pine cone as toppers.

I think these will look lovely stacked up on our faux fireplace this year!

Jeanine
Share
Tweet
Pin
Share
3 comments
I've had these little tart tins for a while now.  You've probably seen them in blogland and in Somerset Living magazine - they even sell them on their website but I got mine off of Etsy.  I knew I wanted to make them into ornaments so I got the hubby to drill a little hole in each one yesterday so I could make these Santa ornaments:
Both images are from the Graphics Fairy.  First I tried to stick them on with Mod Podge.  That was a bit of an epic fail as they peeled off.  Plan B: Glue Dots.  I put like four or five of them on the backs of the cardstock and voila! - they stayed put.
Next I drizzled some glue on the edges and pressed them into some German glass glitter.  I also added some glitter to each image to make them sparkle.  The final touch was the red and green ribbon.

Now I have two new Xmas ornaments to add to our rustic-inspired tree this year!

Jeanine
Share
Tweet
Pin
Share
1 comments
I was at my local Marshall's last week and could not believe the gorgeous wrapping paper they have this year!  Lookie what I picked up.  It's so pretty that I actually framed it:
I really am a sucker for sheet music and I can see lots and lots of faux presents under the tree wrapped in this paper.
I have some other plans for it on some petite boxes and such. 

And of course I can't wait to wrap some real presents with it!

Jeanine
Share
Tweet
Pin
Share
12 comments
It was a bit mild here today so I was able to get outside and do some spray painting.  First up was the little wood sled I got last weekend at a church thrift store fall festival.  I gave it a few coats of black paint:
Then I sanded some random edges to give it a more shabby look.  I traced some sheet music around the "seat" part and cut it out.  Break out the Mod Podge and add a coat to stick it to the wood and then another coat to seal it in.
While the Mod Podge was drying, I printed off the great vintage Santa image from the Graphics Fairy.  I glued that to the middle of the sheet music.
Then I tied on some twine and tea-stained red seam binding.  The faux pine cone and berries, I picked up from the dollar store.  Just slip that under the twine and seam binding.  Final touch was the joyeux noel tag clipped on with a French script clothes pin.

I may or may not add some glitter for a more sparkly look but I'm really pleased overall with the final look!  P.S. Now that my new blog has reached 200 followers, I'll be putting together that giveaway I mentioned a week or so ago!

Linking to Between Naps on the Porch: Met Monday and The Graphics Fairy: Brag Monday.

Jeanine
Share
Tweet
Pin
Share
17 comments
Popped over to the local church thrift store this morning and picked up some goodies that I think will work for the holidays:
The cake stand is missing the bottom piece but for 50 cents, I can deal with it.  I love the little rag heart primitives wreath.  The colors are very Xmas-y to me.  The little urn I think would look lovely with some candies.  Here's a close-up of the lion handles:
And I just couldn't resist these tea cups.  They scream shabby chic to me!
All this for $5.  Can't beat that!  And there's another church fair tomorrow so I'm sure I'll find some great stuff there too!

Jeanine
Share
Tweet
Pin
Share
4 comments
Newer Posts
Older Posts

About Me

My photo
Okio B Designs
I am a small business owner by day, and mom of two boys and DIY crafter by night. You might remember me from my old blog: One Cheap B*tch. I love sharing my tips and tricks to create affordable home decor, fashion, food, crafts and more! Drop me a line at spam-proof: jeanineb4etsy(at)yahoo(dotcom). Thanks for stopping by! Jeanine
View my complete profile

Shop the Post

Follow Me on LikeToKnow.It

liketoknow.it/OkioBDesigns

Follow Me on Pinterest!

Follow Me on Pinterest

Follow Me on Instagram!

Instagram

Follow Me on Twitter

Tweet

PR/Advertising

OkioBDesigns is a PR-friendly blog. If you have a product or service, you'd like to submit for review, please email me at jeanineb4etsy(at)yahoo(dotcom).


Please use the email address above for advertising rates and information.


My tool caddy in Romantic Homes

My tool caddy in Romantic Homes

Good Housekeeping August 2011

Good Housekeeping August 2011

Search This Blog

Blog Archive

  • ►  2025 (3)
    • ►  February (2)
    • ►  January (1)
  • ►  2024 (7)
    • ►  July (1)
    • ►  June (2)
    • ►  May (2)
    • ►  April (1)
    • ►  January (1)
  • ►  2023 (21)
    • ►  December (5)
    • ►  November (2)
    • ►  September (1)
    • ►  August (1)
    • ►  July (3)
    • ►  June (1)
    • ►  May (4)
    • ►  April (3)
    • ►  January (1)
  • ►  2022 (23)
    • ►  December (3)
    • ►  November (4)
    • ►  September (2)
    • ►  August (1)
    • ►  July (2)
    • ►  June (4)
    • ►  April (1)
    • ►  February (3)
    • ►  January (3)
  • ►  2021 (49)
    • ►  December (7)
    • ►  November (3)
    • ►  October (3)
    • ►  September (4)
    • ►  August (3)
    • ►  July (4)
    • ►  June (3)
    • ►  May (4)
    • ►  April (8)
    • ►  March (4)
    • ►  February (2)
    • ►  January (4)
  • ►  2020 (37)
    • ►  December (10)
    • ►  November (11)
    • ►  October (5)
    • ►  September (2)
    • ►  August (1)
    • ►  July (2)
    • ►  April (3)
    • ►  February (2)
    • ►  January (1)
  • ►  2019 (40)
    • ►  December (1)
    • ►  November (4)
    • ►  October (5)
    • ►  September (4)
    • ►  August (1)
    • ►  July (2)
    • ►  June (5)
    • ►  May (3)
    • ►  April (5)
    • ►  March (2)
    • ►  February (3)
    • ►  January (5)
  • ►  2018 (43)
    • ►  December (4)
    • ►  November (5)
    • ►  October (7)
    • ►  September (4)
    • ►  August (1)
    • ►  July (1)
    • ►  June (6)
    • ►  May (2)
    • ►  April (3)
    • ►  March (1)
    • ►  February (4)
    • ►  January (5)
  • ►  2017 (44)
    • ►  December (5)
    • ►  November (5)
    • ►  October (3)
    • ►  September (3)
    • ►  August (2)
    • ►  July (4)
    • ►  June (4)
    • ►  May (3)
    • ►  April (3)
    • ►  March (3)
    • ►  February (5)
    • ►  January (4)
  • ►  2016 (58)
    • ►  December (5)
    • ►  November (5)
    • ►  October (7)
    • ►  September (7)
    • ►  August (4)
    • ►  July (4)
    • ►  June (2)
    • ►  May (2)
    • ►  April (6)
    • ►  March (3)
    • ►  February (6)
    • ►  January (7)
  • ►  2015 (89)
    • ►  December (4)
    • ►  November (7)
    • ►  October (6)
    • ►  September (8)
    • ►  August (7)
    • ►  July (8)
    • ►  June (8)
    • ►  May (6)
    • ►  April (7)
    • ►  March (9)
    • ►  February (9)
    • ►  January (10)
  • ►  2014 (152)
    • ►  December (10)
    • ►  November (11)
    • ►  October (13)
    • ►  September (11)
    • ►  August (8)
    • ►  July (16)
    • ►  June (17)
    • ►  May (12)
    • ►  April (13)
    • ►  March (13)
    • ►  February (14)
    • ►  January (14)
  • ►  2013 (199)
    • ►  December (15)
    • ►  November (15)
    • ►  October (15)
    • ►  September (15)
    • ►  August (15)
    • ►  July (17)
    • ►  June (19)
    • ►  May (18)
    • ►  April (18)
    • ►  March (18)
    • ►  February (19)
    • ►  January (15)
  • ►  2012 (186)
    • ►  December (19)
    • ►  November (14)
    • ►  October (18)
    • ►  September (16)
    • ►  August (10)
    • ►  July (14)
    • ►  June (17)
    • ►  May (15)
    • ►  April (14)
    • ►  March (15)
    • ►  February (17)
    • ►  January (17)
  • ▼  2011 (118)
    • ►  December (17)
    • ▼  November (19)
      • Basket o' Postcards
      • Home Goods to the Rescue!
      • Let the Decorating Begin!
      • White Wednesday
      • Advent Bags
      • Mini Bottle Brush Trees
      • Basket O' Book Stacks
      • It's Giveaway Time!
      • Touches of Glitter
      • Dollar Store Matchbox Makeover
      • Goodwill Makeovers
      • Burlap Stocking
      • Thrifty Holiday Shaker Boxes
      • Tart Tin Ornaments
      • Possibly The Prettiest Xmas Wrapping Paper Ever
      • Thrift Store Wood Sled Makeover
      • Friday's Thrifty Finds
      • Creating Vintage Charm
      • Sheet Music Cones
    • ►  October (12)
    • ►  September (9)
    • ►  August (8)
    • ►  July (17)
    • ►  June (25)
    • ►  May (11)

Created with by ThemeXpose